 FREE 1 to 3-Day Delivery on Orders $119+ Details

How to Install RBP 2.25 in. Leveling Kit (07-18 Wrangler JK) on your Jeep Wrangler
Installation Time
2.5 hours
Tools Required
- 10mm Wrench or Socket
- 19mm Deep Socket
- 18mm Wrench or Socket
- Crescent Wrenches
- Floor Jack
- Jack Stands
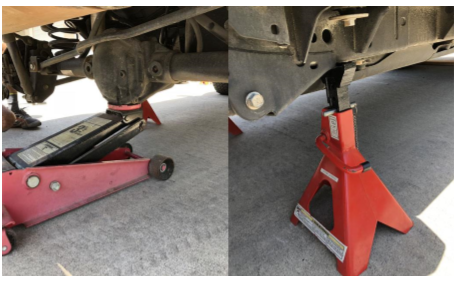
1. Begin by jacking up the vehicle and placing jack stands to support the frame. Place wheel-chocks behind both rear wheels to prevent any movement. Place the jack under the front axle. Remove both front tires with a 19mm deep socket.
Note: Work only on one axle at a time. Complete the front before moving to the rear suspension.
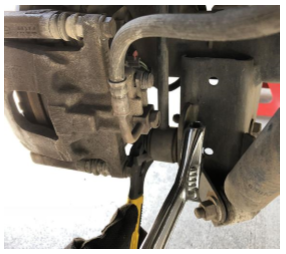
2. Remove the brake hose and ABS wire bracket from the axle using a 10mm socket.
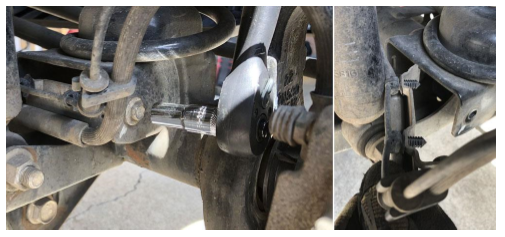
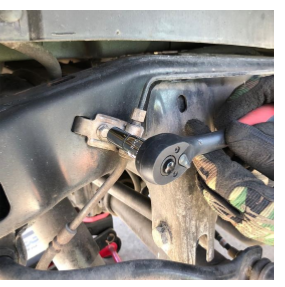
3. Remove the bottom sway bar link bolt where it connects to the axle using a 18mm wrench.
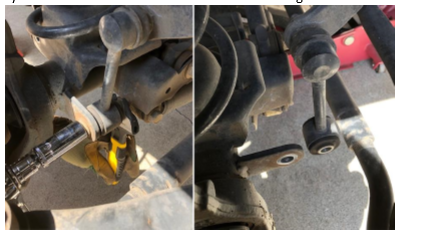
4. Remove the lower shock-mount bolts using a 18mm wrench.

5. Begin to slowly lower the jack supporting the axle, be careful with the brake lines to make sure they are not extended too far.
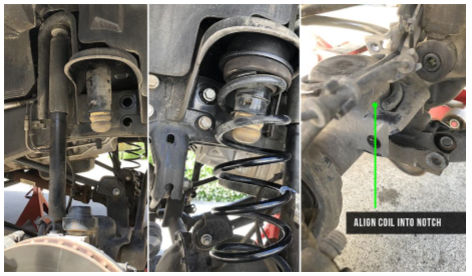
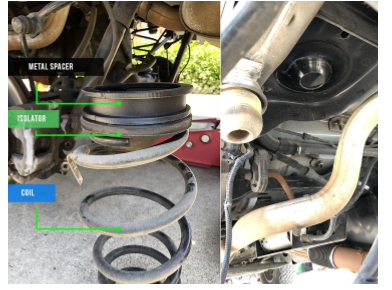
6. Remove the spring and isolator from the vehicle. Install the RBP spacer first, followed by the isolator and the spring. Make sure the spring is seated correctly by twisting it to nest into the notch.
7. Proceed to reinstall the components in reverse order. Install the lower shock bolt and torque to 56 ft/lbs, sway bar link (torque to 75 ft/lbs) and ABS wire bracket (Hand tight). Repeat the steps on the passenger side of the vehicle. Once both sides are completed, reinstall the wheels and torque the lugnuts to 110 ft/lbs.
8. Move to the rear of vehicle to install the final two spacers. Jack up vehicle and place it on jack stands. Move the jack and place it underneath the rear axle to support it. Remove the rear wheels with a 19mm deep socket and set the wheels aside.
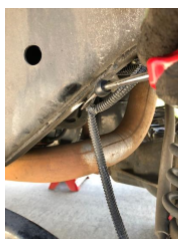
9. Remove the brake clamp from the frame using a 10mm socket.
10. Remove the lower swaybar link using a 18mm wrench or two Crescent wrenches.
11. Remove the lower shock bolt using a 18mm socket. Use a wrench to hold the nut on the opposite side.
12. Using your hands or a plastic rivet removal tool, pop out the plastic rivets from the frame so the axle can lower all the way down without pulling too much on the cable.
13. Lower the axle down and remove the coil and isolator. Place the new spacer on and facing downward. Next comes the isolator, then finally the coil. Place them back in and ensure that the spacer is properly seated at the top. Repeat on opposite side.
14. Jack up the axle and proceed to reinstall the components in reverse order. Install the lower shock bolt and torque to 56 ft/lbs, sway bar link (torque to 75 ft/lbs) and ABS wire bracket (Hand tight). Repeat the steps on the passenger side of the vehicle. Push the plastic rivets back into their places. Once both sides are completed, reinstall the wheels and torque the lugnuts to 110 ft/lbs.
15. Sit back and admire your new look!!
Installation Instructions Written by ExtremeTerrain Customer Joe Rivera 05/01/2018.
Note: Work only on one axle at a time. Complete the front before moving to the rear suspension.