 FREE 1 to 3-Day Delivery on Orders $119+ Details

How to Install KC HiLiTES 3 in. C-Series C3 LED Light Cubes - Flood Beam - Pair on your Jeep Wrangler
Installation Time
1.5 hours
Tools Required
- Box Cutter or Knife
- Torx Bits
- Crescent Wrench or 10mm Socket
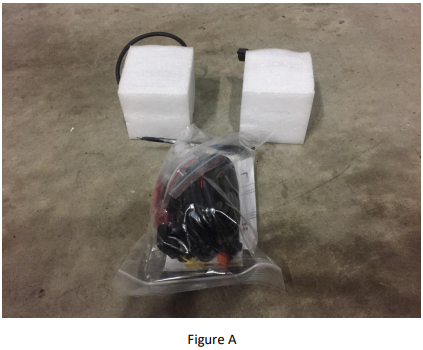
1. Carefully open your box and ensure both lights and the wiring harness with switch and housing are included (Figure A).
2. Once you've unboxed all the items, remove the fuse from the fuse harness (Figures B & C).

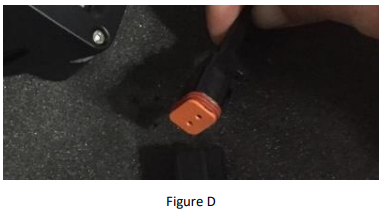
3. Run the wiring with orange ends (Figure D), which will connect to your lights, to where you plan to have your lights mounted. Light placement is up to you, though common placements are the A-Pilar, windshield, or front bumper and will require light mounts (not included). When running your wiring, one end is significantly longer than the other. This will be the wire that you'll use to cross to the far side of your vehicle (opposite your battery's side).
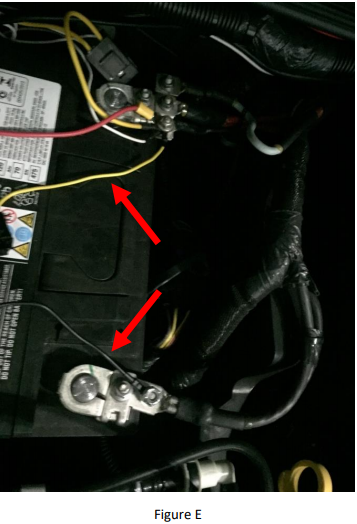
4. Connect the yellow and black wires on the other end to the battery. Yellow will attach to the positive and black will attach to the negative (Figure E).
Note: Pictured in Figure E are additional yellow and red wires on the positive terminal. These are another light source that has nothing to do with this installation. Please disregard those.
5. Run the wire with red and yellow ends into your cab at the location you plan to mount your switch. Switch placement and wire-running locations are up to you. You can use the included switch and drill two 1/8" holes to mount the included switch and mount on your dash or you can utilize pre-molded switch placements such as the A-Pillar.
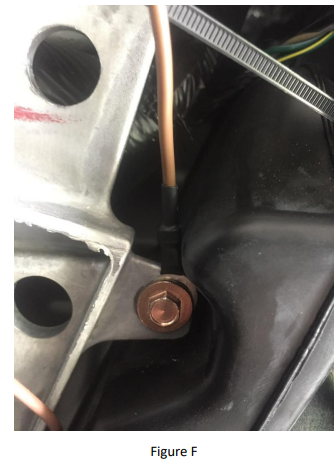
6. Where you choose to mount your switch, find a location near with direct metal to attach your brown ground wire to (Figure F), ensuring it's close enough to reach the switch.
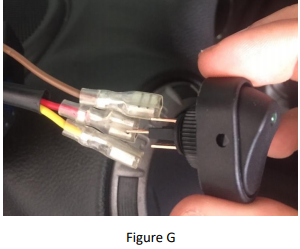
7. Attach all three wires to your switch (Figure G). If you are using the supplied switch, the wires will attach as follows:
- Brown to Earth
- Red to Load
- Yellow to Supply
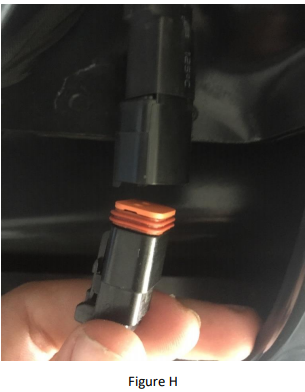
8. Place your lights into your desired mounting brackets (not supplied) and connect the lights to the orange ends until you hear a click (Figure H).
9. Ensure switch is in "off" position and place the fuse you removed in Step 2 back into the harness.
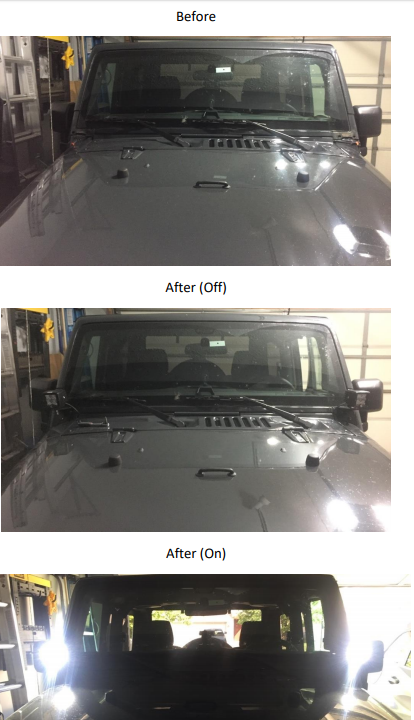
10. Flip switch to "on" position to ensure lights turn on properly
Installation Instructions Written by ExtremeTerrain Customer J. Sandlin 04/20/2017.