 FREE 1 to 3-Day Delivery on Orders $119+ Details

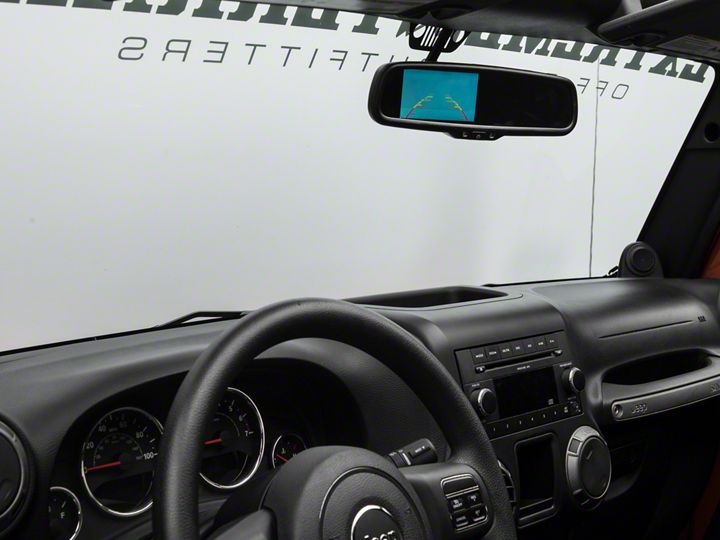
How to Install a Raxiom Auto-Dimming 3.5 in. Rearview Mirror w/ Backup Camera on your 2007-2017 Jeep Wrangler JK
Installation Time
30 minutes
Tools Required
- T20 Torx bit
- Lug wrench
- Pliers
- Clippers
- Razor knife
Shop Parts in this Guide
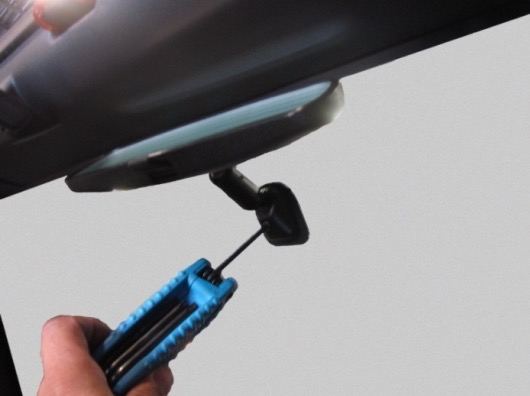
Step 1:
Maneuver the mirror up to gain access to the mounting screw. Using a T20 Torx, unscrew the mounting screw and pull upward on the mirror to remove it from the windshield.
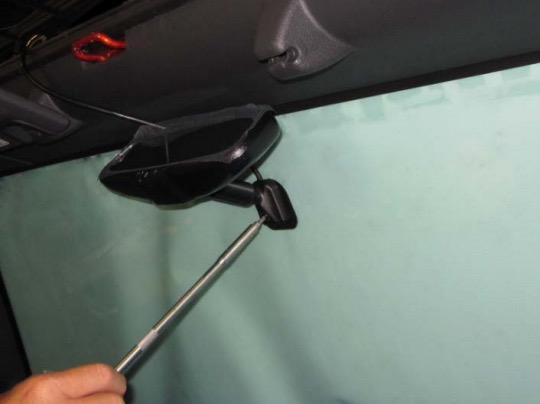
Step 2:
Place the new mirror over the metal windshield mount and slide it down. Tighten the T20 Torx screw, until snug.
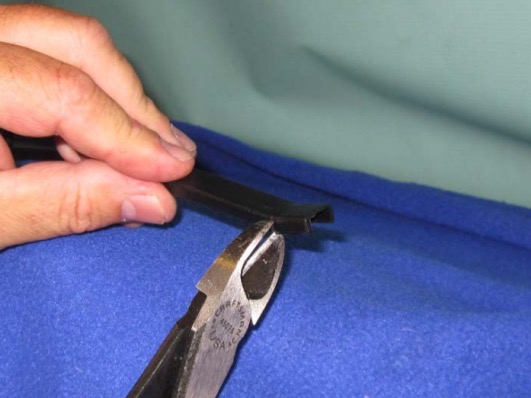
Step 3:
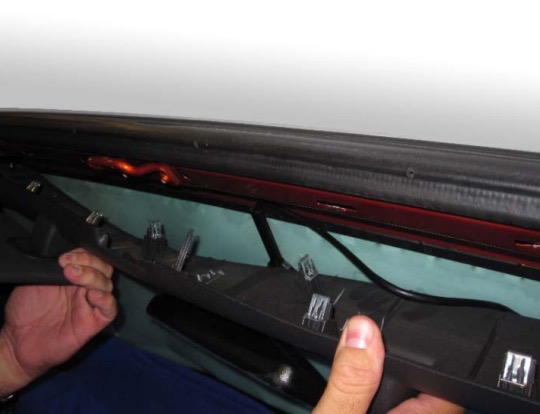
Find the wire cover and remove the outer sliding section, cut ½” off the non-clip side of the inner wire cover and place it on top of the mirror.
Step 4:
Pull down the upper windshield trim and route the wiring through the trim piece.
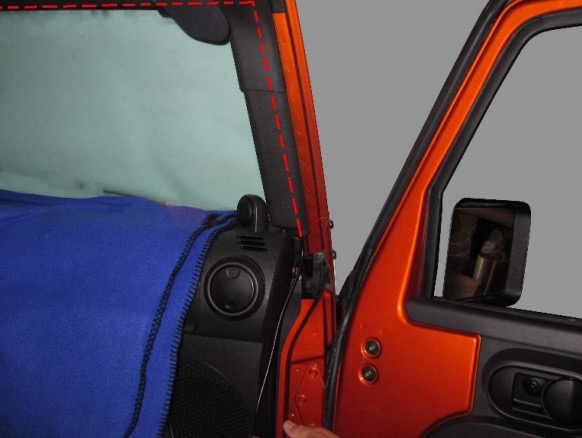
Step 5:
Remove the passenger kick panel by pulling up on it, and route the rearview intermediate wiring up along the windshield and across the top of the windshield to meet the rearview mirror wires.
Step 6:
Plug the rearview intermediate wiring into the rearview mirror.

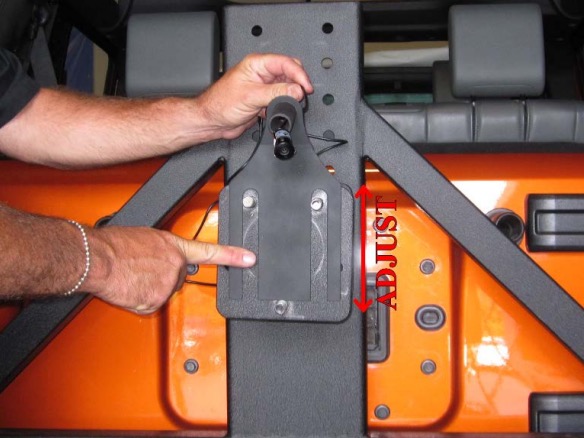
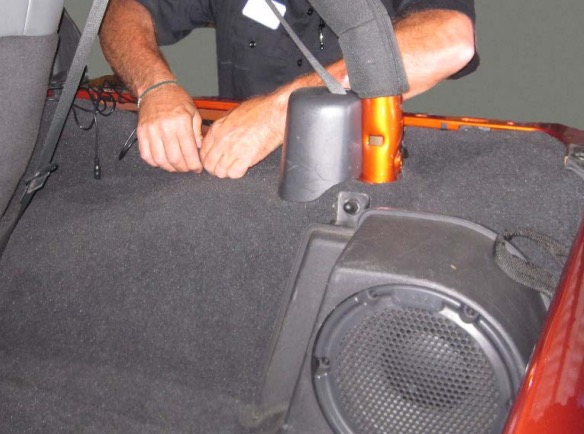
Step 7:
Remove the rear spare tire from the vehicle. Run the camera through the camera mount, but do not push it in all the way. Have someone hold the camera in place.
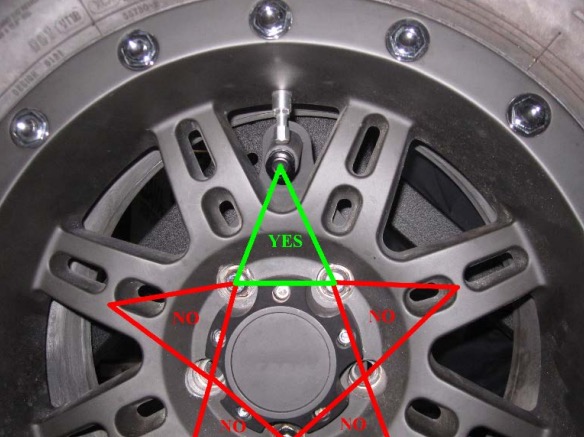
Step 8:
Find the correct positioning of the wheel. There should be an opening in the middle of 2/5 of the lug holes. Place the wheel back onto the vehicle and adjust the camera mount to a proper height and center point.
Step 9:
DOOR MOUNT TIRE HOLDER: If the spare tire is mounted on the rear door, the camera wire can be fed through the grommet on the door to the interior.

Step 10:
DOOR MOUNT TIRE HOLDER: On the inside of the rear door there is a plastic wire cover running horizontal across the door; pull out on the bottom of the plastic to pop the 4 pressure pins, then pull out and down to remove the top of the plastic. Run the camera wire along the existing wire harness and into the vehicle
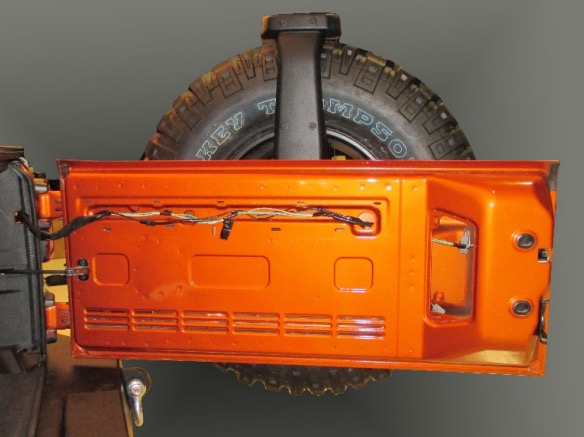
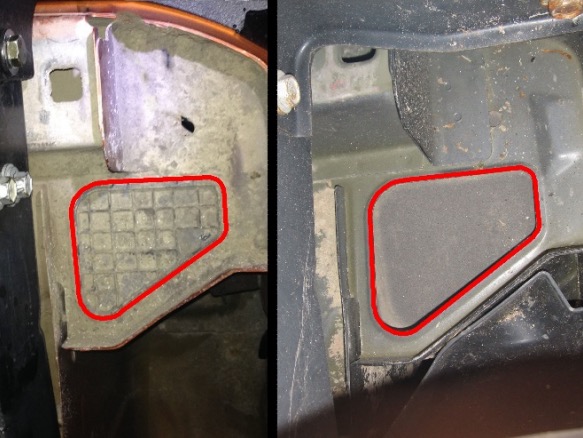
Step 11:
BUMPER MOUNT TIRE HOLDER: Route the camera wiring from the camera, along the tire holder to the tire holder pivot point. Under the rear passenger side of the vehicle; there is an access door. 1 type is plastic, 1 type is foam rubber. Your vehicle will have one or the other. Remove this access panel. Modify the access panel to allow the wire to enter into the vehicle.
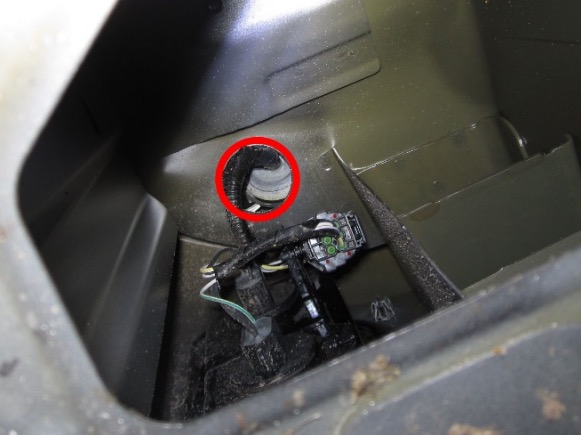
Step 12:
With the access panel removed, access the rubber grommet at the top of the compartment and remove it from the hole. Cut a small hole into the rubber grommet, then insert the camera wire through the grommet. Replace the grommet and access door.
Step 13:
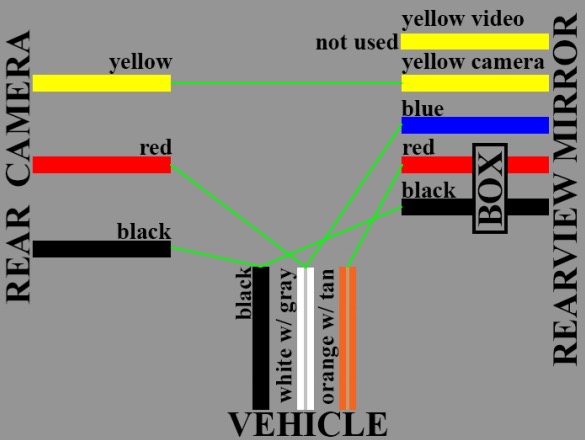
Attach the camera wire to the intermediate camera wire. There are 2 green wires with 2 white wires. If you wish to have parking lines, connect the 2 green wires to each other. The white wires are for forward facing cameras and will not be used in this application.

Step 14:
Run the intermediate camera wire to the front passenger kick panel area of the vehicle. Place the wire behind carpet and interior panels. Keep it away from heat sources, sharp edges, pivot points or anything else that could damage the wiring.
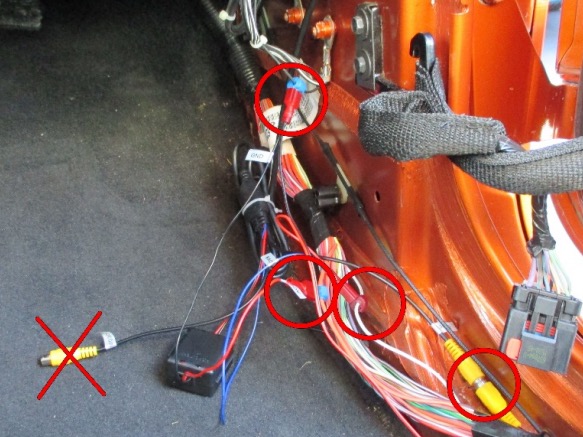
Step 15:
Connect all the wiring with the supplied connectors. Use the wiring diagram to attach all the wires. Be sure to press the connectors tight with a pliers, so they make contact.
Step 16:
Block the vehicles wheels, engage the parking brake. Have someone else shift the transmission into reverse with the key on and engine off. If everything works correctly, push the camera into the mount while watching the display to ensure it is straight. Secure all the wiring and reinstall the passenger kick panel. If the camera feed is not shown when in reverse with the car on, engine off; recheck all connections and make sure they are tight.
“Due to possible manufacturer changes, it is recommended that you test all wires using a voltage meter or similar device to confirm the wires being used are correct for purposes intended. Failure to do so may result in damage or product failure.
