 FREE 1 to 3-Day Delivery on Orders $119+ Details

How to Install Raxiom Rear Parking Sensors - Unpainted on your Wrangler
Installation Time
2 hours
Tools Required
- Power drill
- 1/2" drill bit
- Tape measure
- Blue painters tape
- Razor blade
- Pliers
- 5/8" wrench
- Wire snake
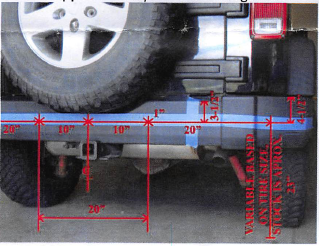
Step 1:
Place some painters tape on a cool rear bumper running the full length from left to right. Place the top edge approximately 2-1/2" down from the top of the inner section of the bumper. Find the exact center of the bumper with a plumb bob or tape measure. Measure out 10" each way for a total spacing of 20", then measure from those marks an additional 20" and mark a drill hole. Vehicles with stock tires will place the sensors approximately 23" from the ground.
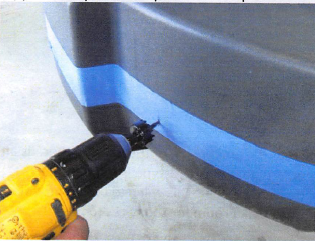
Step 2:
Using the supplied hole saw to drill a hole at each of the (4) previously marked spots from step 1.
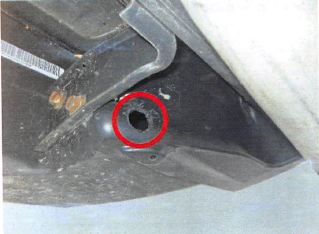
Step 3:
Once the (2) inner holes are drilled into the outside of the bumper, use a J4" drill bit to drill a hole into the back of the bumper (to route sensor cables). Angle the drill at a 30 degree angle

Step 4:
Using the supplied hole saw, drill (2) holes into the backside of the bumper corners to route sensor cables as shown.
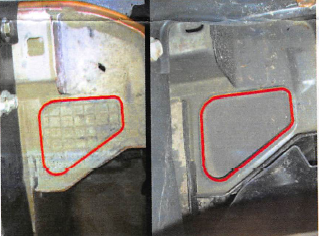
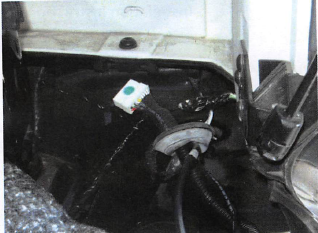
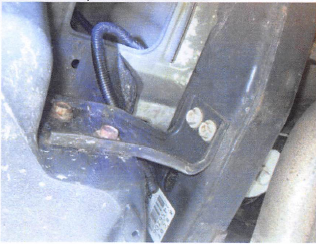
Step 5:
Under the rear passenger side of the vehicle; there is an access door. 1 type is plastic, 1 type is foam rubber. Remove this access panel. This will need to be modified with a razor to make room for the wires to pass through.
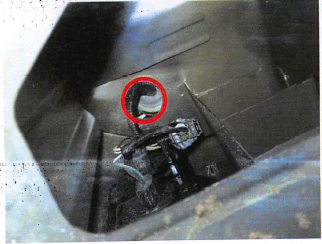
Step 6:
At the top of the area there is a rubber grommet, push this up and move to the top of the vehicle.
Step 7:
Pull back the carpet. Cut a small slit into the rubber wire boot and insert the white electrical
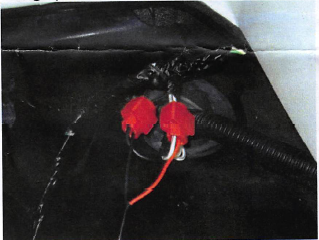
Step 8:
Use the supplied wiretap to attach the black wire from the unit to the black wire on the vehicle. Use the other tap to attach the red wire from the unit to the white with gray wire (12v.Reverese trigger) on the vehicle.
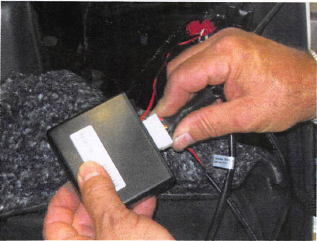
Step 9:
Plug the speaker into the unit by attaching the two black connectors.
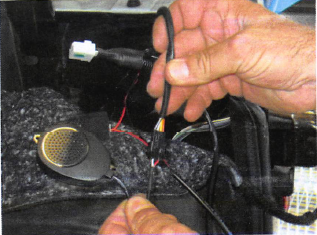
Step 10:
Insert the white plug into the control module; then mount the module with the supplied mounting adhesive on the bottom of the module. Replace the carpet and mount the speaker grill is unobstructed.
Step 11:
Under the vehicle, run the wire over the top of the rear bumper support. Insert the first sensor connector into the first hole, (it may be helpful to insert a wire snake from the outside of the bumper, through both holes, then tape the wire to the snake and pull it back through the hole until it exits the exterior hole.) run the rest of the harness up and over the frame.
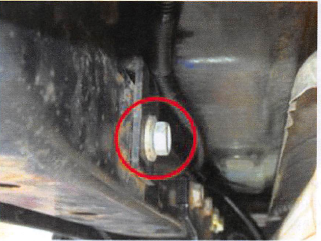
Step 12:
Loosen the (2) inner 5/8" bumper bolts one full turn under the back of the vehicle. The bracket is slotted and this will allow for slight upward movement of the bumper during install.
Route the wiring along the cross beam. Insert a wire snake from the outside of the bumper, through both holes and over the top of the cross beam, tape the wire to the snake, then while pushing up on the plastic bumper, pull the wire back through both holes.
Step 13:
Use a razor blade to clean around the edge of the (4) holes on the outside of the rear bumper.
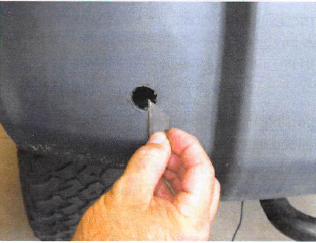
Step 14:
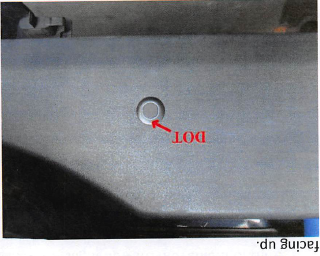
Plug the yellow plugs into the back of the sensors. Place a sensor into each hole, with the dot along the edge, facing up.
*FOR VEHICLES WITH AFTERMARKET TIRES: If your spare tire is larger than a stock tire, you may need to adjust your spacing slightly. Keep the sensors equal distance apart if adjustments are made.
*FOR VEHICLES WITH AFTERMARKET BUMPERS: Be sure to use rubber jackets when installing the sensors into a metal bumper.
*FOR VEHICLES WITH MODIFIED SUSPENSION: Keep the sensors as low as possible on the vertical part of the bumper as possible. Do not angle the sensors downward.
"Due to possible manufacturer changes, it is recommended that you test all wires using a voltage meter or similar device to confirm the wires being used are correct for purposes intended. Failure to do so may result in damage or product failure."
