FREE 1 to 3-Day Delivery on Orders $119+ Details

How to Install KC HiLiTES LED Light Bar, 10 in. w/ Harness Combo on your 87-18 Jeep Wrangler YJ, TJ, JK & JL

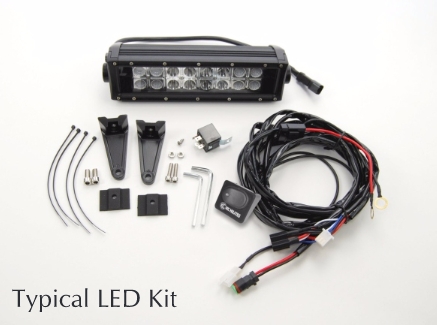
Shop Parts in this Guide
PLEASE NOTE - This light bar is for OFF ROAD USE ONLY
INSTALLING THE BRACKETS
1. Using the Allen wrench supplied, attach one bracket to each end of the bar (they can be mounted facing inward or outward depending on your needs. Tighten only enough to hold in place. Later, after aiming, you will tighten securely.
MOUNTING YOUR LIGHTS
1. Choose a location on your bumper or other flat surface for mounting
your bar. Measure the distance between mounting bracket holes and mark carefully. Now drill an 8mm hole for each bracket. Install the bar with the bolts and nuts supplied and tighten securely.
WIRING YOUR LIGHTS
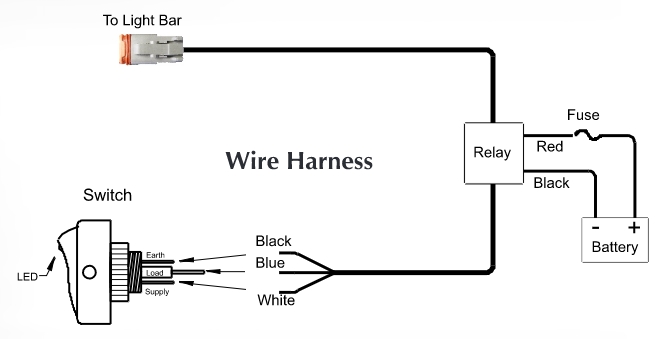
1. Remove the fuse from the harness. Attach the harness wire to the light. Route the harness toward the 12V battery/power source and mount the relay using the supplied sheet metal screw. Attach the negative (black) wire to a good chassis ground and power (red) wire to a positive 12 volt power source.
2. Find a suitable location inside the passenger compartment for your switch. Mark and drill two 1/8" holes, insert screws and loosely install the panel to ensure fit. Remove panel, install switch, and slide panel with switch, back in place. (Do not tighten. The panel and switch will be removed when attaching wires.)
3. Continue routing harness through the firewall to the inside of the vehicle toward the switch and panel previously installed. // you are unable to find an existing hole in the firewall, it may be necessary to cut a 1/2" hole for the switch terminals to pass through. Once the wires are inside the vehicle near the switch, remove the panel with switch and attach the blue wire to the switch terminal marked LOAD. Attach the white wire to the switch terminal marked SUPPLY. Attach the black wire to the switch terminal marked EARTH. Re-attach the panel with switch and tighten screws.
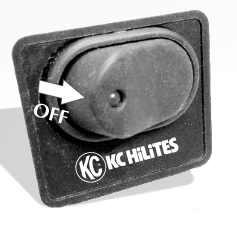
4. Ensure the switch is in the OFF position (as illustrated), then re-install the fuse.
AIMING YOUR LIGHTS
1. Since this light bar is not legal on any public road or highway, aiming is entirely up to you. Most prefer the beam as far down the road as possible, others adjust it slightly down to illuminate more area close to the vehicle.
2. After aiming the bar to your preference, tighten all hardware.